
Your guide to blind fragrance trials
TL;DR:
- Blind fragrance trials remove visual cues and rely solely on scent, helping you make confident, unbiased choices. Conduct evaluations over multiple days, at different times, and with randomized codes to verify genuine preferences while preventing fatigue and bias. Using structured scoring and repeated testing ensures you select fragrances that truly suit your personal chemistry and taste.
You have probably bought a fragrance based on the bottle design or the brand name, worn it for a week, and quietly regretted it. Most people have. Marketing and packaging are designed to sell, not to match your nose. A proper guide to blind fragrance trials solves that problem by removing every visual cue from the process and letting the scent speak entirely for itself. This guide covers exactly how to set up, run, and interpret blind trials at home, from gathering materials to making your final purchase decision with genuine confidence.
Table of Contents
- Key takeaways
- Setting up for blind fragrance trials
- How to conduct fragrance trials step by step
- Common challenges and how to handle them
- Interpreting and verifying your results
- My perspective on blind testing fragrances
- Start your blind trials with Theperfumesampler
- FAQ
Key takeaways
| Point | Details |
|---|---|
| Remove all visual cues | Label samples with letters or numbers only, so brand and bottle cannot influence your perception. |
| Follow timed evaluation rounds | Assess each fragrance immediately, at 10 to 15 minutes, and again after one to two hours for a complete picture. |
| Limit sessions to 3 to 4 samples | Testing more than four fragrances per session causes olfactory fatigue and makes results unreliable. |
| Use a scoring system | Rate each sample on liking, longevity, and sillage to produce objective rankings you can compare across days. |
| Verify results over multiple days | Repeat tests with randomised codes on a separate day before making any purchase decision. |
Setting up for blind fragrance trials
Getting the setup right is more important than most people realise. A poorly prepared environment produces unreliable results, regardless of how carefully you evaluate each scent.
Materials you need
- Scent strips or plain index cards (minimum six per session)
- A pen and a separate notepad for scoring
- Fragrance decants or spray bottles with consistent output
- Labels using only letters or numbers, applied before testing begins
- Coffee beans or unscented crackers for nose resetting
Pro Tip: Use 2ml or 3ml fragrance decants for blind trials. They are easy to apply consistently and keep sample volumes equal across every strip.
Environment conditions
The room you test in matters. Choose a space with neutral air, no cooking smells, no air fresheners, and no strong cleaning products nearby. Subdued lighting helps too. Blind testing in low light removes the last remaining visual cues and further reduces the influence of bottle shape or colour on perception.
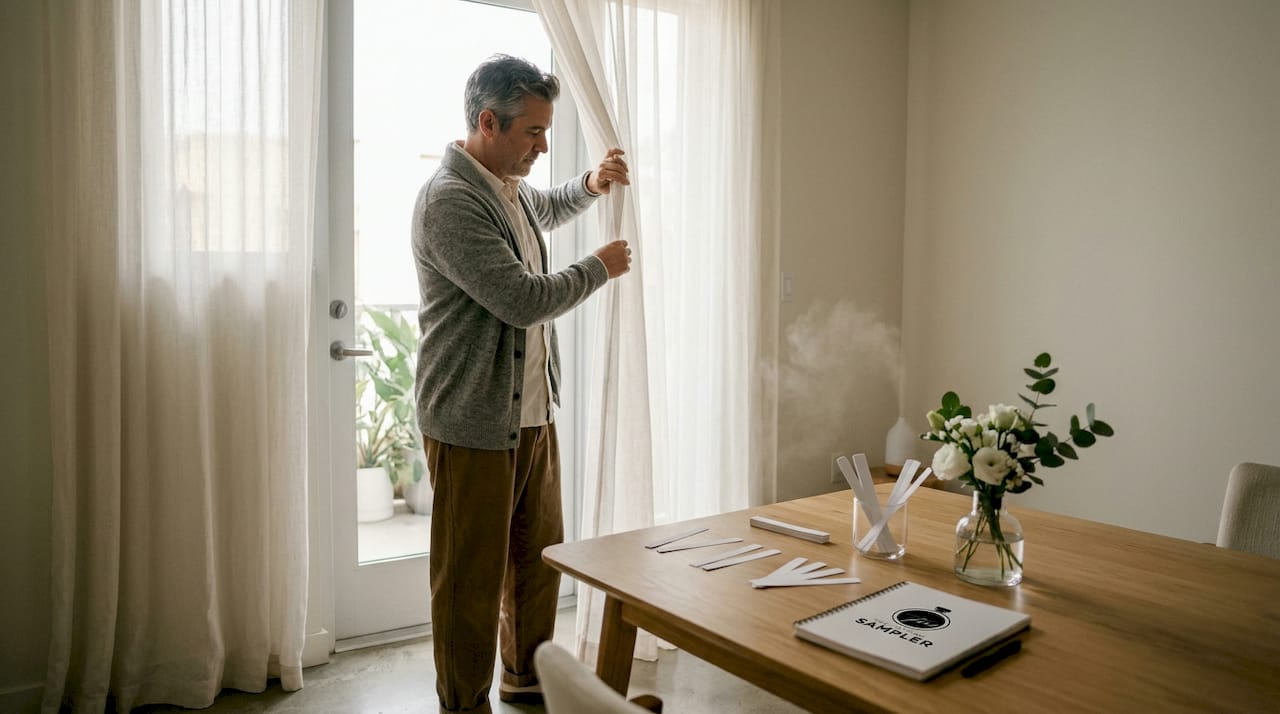
Keep windows closed during testing to prevent air from carrying scents in or dispersing samples too quickly. A quiet room with minimal foot traffic gives your nose a stable baseline to work from.
Comparing materials and environments
| Option | Pros | Cons |
|---|---|---|
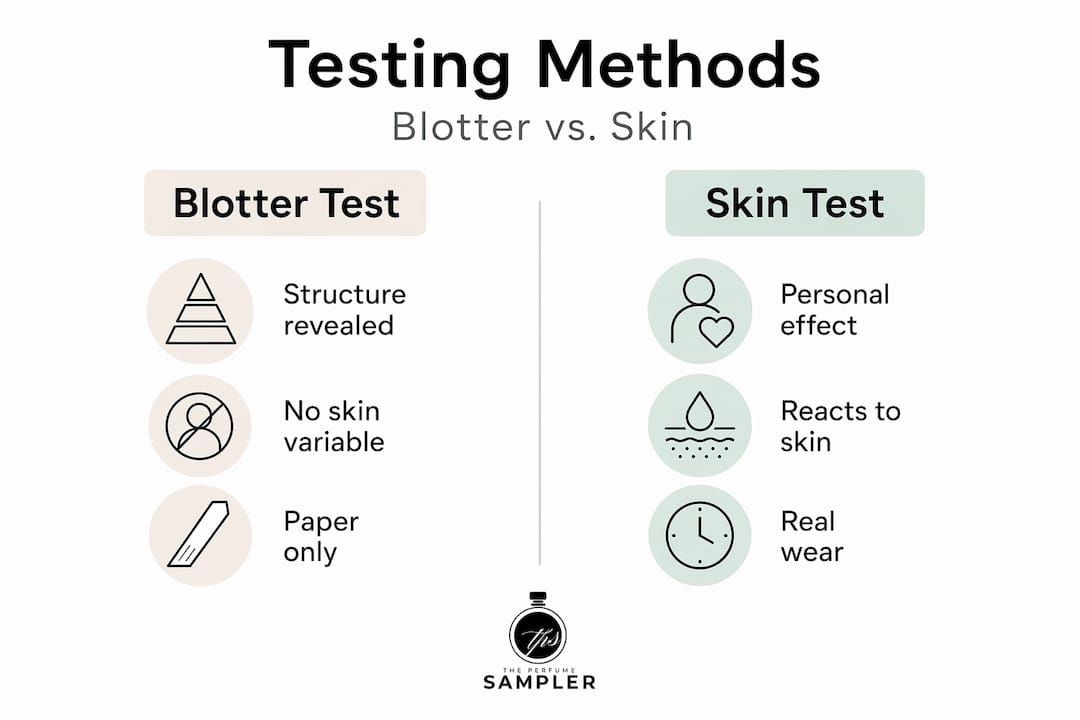
| Scent strips | Easy to label and store; no skin chemistry variable | One-dimensional; does not show full evolution |
| Skin testing | Reveals true character and drydown | Limit of 2 to 4 spots; skin chemistry varies |
| Low lighting or dark room | Removes visual brand bias | Requires extra care with labelling |
| Neutral smelling room | Stable baseline; consistent results | Not always easy to achieve at home |
How to conduct fragrance trials step by step
A structured process is what separates useful data from vague impressions. Follow these steps every session.
-
Assign codes before you begin. Write a letter or number on each strip label before applying any fragrance. Do not look at the original bottle while spraying. Have a helper prepare samples if possible, so you have no prior knowledge of which code corresponds to which scent.
-
Apply equal amounts to each strip. One spray per strip, held at a consistent distance of around 10 centimetres. Allow five seconds for the alcohol to begin dispersing before bringing the strip near your nose.
-
Evaluate immediately. Spend 30 seconds with each strip. Note your very first emotional response and any words that come to mind. This is the top note phase. Top notes fade within minutes, so record impressions quickly.
-
Reset your nose between samples. Smell the back of your wrist or inhale from a container of coffee beans for 20 to 30 seconds. Olfactory diversion refreshes scent sensitivity and prevents one fragrance from bleeding into the next.
-
Return at 10 to 15 minutes for the heart phase. This is where a fragrance shows its true character. The opening notes have faded, and the core accord is now dominant. Score each strip from 1 to 10 for how much you like what you smell at this point.
-
Evaluate the drydown at one to two hours. Notes taken at staged checkpoints reveal a fragrance’s lasting character far more reliably than first impressions alone. Score each strip again for longevity and overall appeal.
-
Record scores in your notepad before revealing codes. Once all rounds are complete, tally scores per strip. Only then should you reveal which code corresponds to which fragrance.
Pro Tip: Limit each session to three or four strips maximum. Testing more than five causes nose fatigue that makes later samples seem weaker or blander than they actually are.
Skin testing adds a further dimension. Paper testing is one-dimensional; skin reveals how a fragrance evolves with your body chemistry. Once you have narrowed candidates to two or three using strips, apply each to a separate skin zone, such as the inner wrist and inner elbow, and repeat the timed evaluation rounds on skin.
Common challenges and how to handle them
Even a well-prepared session produces complications. Knowing what to expect keeps results reliable.
-
Olfactory fatigue. Your nose stops registering a scent accurately after repeated exposure. Take a break of at least five to ten minutes between samples, and step outside for fresh air if your sensitivity drops noticeably mid-session.
-
Familiarity bias. If you run the same session two days in a row with identical strip positions and codes, you begin to associate codes with fragrances subconsciously. Randomise labels and order each time to prevent this from skewing your results.
-
Overpowering samples. Some fragrances, particularly heavy orientals or ouds, dominate a session and make everything tested afterwards seem flat. Test these last, or reserve them for a separate session.
-
Memory and emotion triggering unexpected responses. A scent can remind you of a person or a place, which creates an emotional reaction that has nothing to do with the fragrance’s actual quality. Note these associations separately. They are useful data, but they should not be confused with your considered preference.
-
Skin chemistry variation. The same fragrance can smell noticeably different on different people, and even on the same person on different days depending on diet, hydration, and skin dryness. Understanding scent preferences requires you to account for this by retesting on skin across at least two different occasions before drawing conclusions.
Keep a dedicated fragrance journal. Record codes, scores, phase timestamps, and any emotional associations. Patterns across sessions reveal your genuine preferences far more clearly than memory alone.
Blotter and skin testing produce genuinely different experiences. Blotters show you structure; skin shows you suitability. Neither is superior, they serve different purposes at different stages of the trial process.
Interpreting and verifying your results
Collecting scores is only useful if you interpret them correctly. Here is how to move from raw data to a confident decision.
-
Tally scores across all three phases for each coded strip. Add the immediate score, the heart score, and the drydown score together. A fragrance that scores consistently well across all three phases is a stronger candidate than one that opens brilliantly but scores low on drydown.
-
Identify your top two or three candidates from the tally. These move forward to the verification stage.
-
Reassign codes and retest on a separate day. A multi-day blind trial process produces significantly more reliable results than a single session. Swap the codes so that Sample A becomes Sample C and so on. Repeat the timed evaluation on skin.
-
Seek a second opinion. A trusted person who is not familiar with the fragrances being tested can provide observations you may have missed, particularly regarding sillage, the trail a fragrance leaves in the air around you.
-
Test in different situations. Wear a finalist fragrance on a regular day, then on a warmer day, to see how it performs in varying conditions. Temperature significantly affects projection and longevity.
-
Purchase a larger decant or full bottle only after the fragrance has passed at least two separate blind trial sessions on skin. Using a scoring system for ranking throughout the process means your final choice is evidence-based, not impulsive.
Comparison of verification methods
| Method | Reliability | Time required | Best for |
|---|---|---|---|
| Single-day strip test | Low | 2 to 3 hours | Initial shortlisting only |
| Multi-day skin test | High | 3 to 7 days | Final selection confirmation |
| Trusted friend feedback | Medium | 30 minutes | Sillage and social perception |
| Occasion-based wear testing | High | Multiple days | Confirming contextual suitability |
My perspective on blind testing fragrances
I have been through enough fragrance purchases I later regretted to know that the conventional approach of smelling a tester in a shop and deciding on the spot simply does not work reliably. The environment, the sales setting, and the brand presentation all interfere with honest scent perception. Blind trials cut through all of that.
What surprises most people when they first run a structured blind trial is how different their results are from what they expected. Fragrances they assumed they would dislike often score highest. Fragrances they were certain they loved frequently disappoint once the bottle is removed from the equation. I find that genuinely interesting. It shows how much of what we think we like is actually a response to presentation rather than scent.
The other thing I have learned from repeated testing is that preferences evolve. A fragrance that scores a six in January may score a nine in summer because warmer skin amplifies projection in a way that suits the composition better. Multi-day testing across different conditions captures this in a way that a single session never could. I now treat the trial process as the main event, not the purchase.
My honest advice: do not rush the verification stage. The temptation to call a winner after one good session is real, but the fragrances that hold up across three or four separate blind tests on different days are the ones that genuinely become your signature scents. Blind buying without preparation is a different thing entirely. A structured trial process is what turns curiosity into confidence.
— Rupesh
Start your blind trials with Theperfumesampler
Blind trials require small, equal samples of each fragrance you want to test. That is exactly what Theperfumesampler provides. Decants in 2ml, 3ml, 5ml, and 10ml sizes let you test multiple fragrances side by side without committing to a full bottle. Every sample is 100% authentic and sourced directly, so you are evaluating the real fragrance, not a substitute. Find out more about why decants work for scent-first selection, or browse featured options like the Boss Bottled Absolu as a starting point for your next trial session.
FAQ
What is a blind fragrance trial?
A blind fragrance trial is a structured testing method where sample identities are hidden using codes, removing brand and packaging influence so you evaluate a scent purely on how it smells.
How many fragrances should I test per session?
Limit each session to three or four fragrances. Testing more than four causes olfactory fatigue, which makes results unreliable and later samples harder to evaluate accurately.
Why should I test at multiple time intervals?
Fragrances evolve through top, heart, and base note phases. Evaluating at immediate, 10 to 15 minute, and one to two hour intervals gives a complete picture of how a scent performs across its full development.
Is strip testing or skin testing better for blind trials?
Both serve different purposes. Strip testing is ideal for initial shortlisting because it removes skin chemistry as a variable. Skin testing is necessary for final verification because it shows how a fragrance evolves with your individual body chemistry.
How do I confirm a result before buying a full bottle?
Retest your top candidates on a separate day with randomised codes and repeat the full evaluation on skin. A fragrance that scores consistently well across multiple independent sessions is a reliable choice before purchasing.